Ingredients
- 1 whole natural turkey, thawed (12 to 20 lbs) – Do not use pre-brined, injected, enhanced, or koshered turkey
- 1 stick sweet cream butter, melted; mixed with 1/2 cup vegetable oil
- 1/2 cup SYD Original rub (or substitute with 1 part Kosher salt, 1/2 part black pepper, 1/2 part mild chili powder, and 1/2 part garlic powder)
Instructions
- Remove turkey from package. Remove neck and giblets from cavity. Trim off excess fat and the turkey tail. Pat dry inside and out. Ensure that the cavity is open to allow for even cooking.
- Put turkey onto roasting pan breast side up. Rub the melted butter and vegetable oil mixture all over the inside and outside of the turkey.
- Apply a medium coating of Orange Tang on the outside. It’s much easier if you put the Tang into a pizza cheese shaker to apply the Tang. Be sure to apply it evenly else your turkey color will be uneven after it is cooked. Wait 5 minutes for the Tang to be absorbed then touch up the spots you missed.
- Apply a medium coating of SYD rub all over the outside and inside, again with a shaker. Less is more so use less if you’re unsure how much a medium coating is. In my definition of a medium coat, you can still see the skin under the rub.
- Put the roasting pan into the fridge uncovered. Let it sit for at least a day for the dry brine to take effect. Brine for a maximum of 2 days. The salt in the rub will pull moisture from the meat and it will become tacky over time. If you are planning on 2 days, use less rub else the turkey may be too salty.
- When you are ready to cook your turkey, start your smoker and let it settle at 275 degrees.
- Take your turkey cold from the fridge and put it breast side up into your hot smoker. The cold-meat-into-hot-smoker approach encourages the formation of a delightful pink smoke ring which announces to your guests that your bird is authentic low and slow barbecue. I like to use apple wood chunks so I toss a couple of tennis-sized chunks into my fire. Add a chunk every ½ hour afterwards. Stop adding wood when the skin darkens to the color you like. Don’t over smoke your turkey else the skin will get too dark. I avoid cherry wood as it darkens the skin too much.
- Close the lid and come back after 1 ½ hours. Open the pit and check whether crust is starting to form on your turkey skin. If the crust is starting to form, spray your turkey with water in a spray bottle (you can use other liquids like beer, apple juice, pineapple juice; but I find water works best). If the crust is completely wet and not yet set, don’t spray and check back in 15 minutes. Continue to spray every 15 minutes after the crust has set and until turkey is done. The spraying helps to keep the bird very moist.
- The turkey will be ready in 3 to 6 hours depending on the size you began with. Use an instant read thermometer to check for doneness – 160 in the breast and 170 for the thigh. If your turkey is getting too dark, cover with foil. I also cover the wing tips with foil if they look like they are burning.
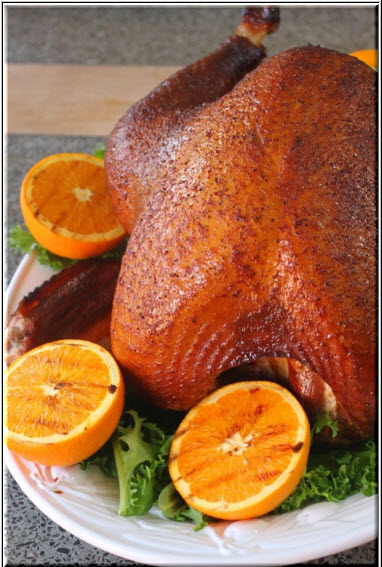
- TIPS – tent the turkey if the skin is getting too dark. If the skin is already dark enough and the turkey is not cooked, remove it and put into the oven to finish. As you can see from my picture, the color is great because I tented the breast when it reached the color I wanted. Also, remember to cut away the skin so the cavity is as big as can be to allow the hot air to cook the insides of the turkey.
- Remove when done and keep warm in a 170-degree oven. Rest for at least 30 minutes before you carve and serve.
- Prep Time: 30 mins
- Cook Time: 6 hours
- Category: Entree
- Cuisine: American

